Anyone who’s been to Dreamforce over the last several years has gotten the message that Salesforce.com sees Chatter as the wave of the future. Until recently, however, it’s been a little hard to see how that vision was going to be realized. You had Chatter, which allowed you to follow and post to either user feeds or record feeds, but other than adding comments, there wasn’t much you could do, and you had the Chatter mobile application for iOS and Android, which allowed you to do the same while you were on the go, but for organizations which hadn’t jumped wholeheartedly into Chatter, there wasn’t a lot of ‘there’ there.
Over the last six months, things have begun to change and the vision is suddenly becoming much clearer. Chatter Publisher Actions (released in Summer ‘13) allow you to add custom actions from directly within the feed, whether it be a standard action like creating a task associated with an opportunity or account, or a more sophisticated custom action (such as a vacation request or sending an email) which can be created directly from within a user’s feed. When you’re operating within the standard Salesforce user interface, Publisher actions seem cool, but not exactly game changing – sure, they can save you a few mouse-clicks, and that adds up over the course of a day, but hardly anything to get excited about (well, that’s not entirely true, but for the purposes of this post, take my word for it).
It’s when you add in the mobile application of Publisher Actions that things really start to get interesting.
Let’s say that you’re a Development Director for a non-profit. You go to a meeting with a potential funder (who’s already in Salesforce, naturally, as you’ve scheduled your meeting there) and you get the sense that there’s some interest and potential for a five-figure gift. Naturally, you want to record this opportunity and maybe you also want to let your Executive Director know about this great new funding opportunity. Depending on your tech savvy and your tools, you might be using the Salesforce Classic application and could log the event, or you could be using the Logger App and add a note or log a quick follow-up task. You could even be using the full Salesforce application via Salesforce Touch if you were working on an iPhone or iPad. Lots of choices, each app providing different ways of capturing a set of information and then trying to act on it.
In most cases, however, people don’t need the full set of functionality available through the full Salesforce UI in a browser, but they need more than Classic or Logger provide. This is where the combination of Publisher Actions and the Chatter Mobile application rise to the top. Chatter Mobile allows you to view and edit records (so if you need to adjust the stage or amount of an Opportunity, you can do so), but it also allows you to record the contextual information about the meeting, by creating a Chatter post (in which you could @-mention your ED to draw their attention to the meeting notes). This is great context, but your leadership wants results – they want to be able to see opportunities created, so when it comes time to forecast revenue, they’ve got something to report on.
As mentioned above, Chatter Publisher Actions allow you to perform simple tasks such as creating child records from directly within the record’s Chatter feed. This means that if your organization has specified a Publisher action for the Account object, such as Create Opportunity, you’ll be able to create a brand new opportunity record directly within the Chatter Mobile application and the fact that you’ve created it will get posted to the Chatter feed for the parent Account object and to anyone elses Chatter Feed who’s following that record.
Okay, you’re sold – so how do you do it? There’s a great guide that Salesforce has put together (https://na15.salesforce.com/help/doc/en/actions_impl_guide.pdf) explaining the process and nuance, but fundamentally, you’ve got a few short steps to take – I did it this morning and all in, I had our first action up and running in about 15 minutes.
The first thing you need to do is to enable Publisher Actions in your Salesforce organization. In Setup, go to Customize–>Chatter–>Settings and click the Edit button. At the bottom of the list, click the Checkbox for Enable Publisher Actions and then hit Save.
Next, go to the object for which you want to create an action. Per our example above, let’s assume that we’re going to add the ability to create a new Opportunity to our Account record (for simplicity’s sake, we’re not going to worry about adding Contact Roles or other fun stuff – we simply want to create an Opportunity associated with a Company). Go to Customize–>Accounts–>Buttons, Links and Actions. You’ll see a list of all of these that have already been configured for the Account object. Click on the New Action button.
On the page that is displayed (Enter Action Information), leave the Action Type as the default, and select Opportunity from the picklist (this will show you the different types of child objects that can be created from your parent Account record). If you have record types enabled, select one (you can create separate actions for each record type). Give the action a label (how it will appear to your user) and a name will be automatically generated. Write a description and click on the Save button.
A Page Layout editor will be displayed – add some fields (not too many, remember, your user is going to be mobile and you don’t want them trying to fill out 50 fields while they’re standing on a subway trying to update their meetings) and Save the record.
Then go to your page layout for the Account object (and for the record type you selected). You’ll see that you have a new category in the Layout editor, called Actions. Here you’ll be able to see all the Publisher Actions you’ve created for the parent object. You’ll also see a Chatter Feed section in the actual layout. If it’s your first time in the editor since enabling Publisher actions, you’ll want to override the global layout (just click on the link). Once you’ve done that, you can drag your new action down to the layout and save.
That’s it. You’ve just created a new action which can be accessed by a user on the Account page in Salesforce, but more importantly, by a mobile user with the Chatter Mobile app. Go back to your mobile device, and in the Chatter mobile app, find an existing Account record. When you click on the + sign, you should now see a new action available called whatever you named it.
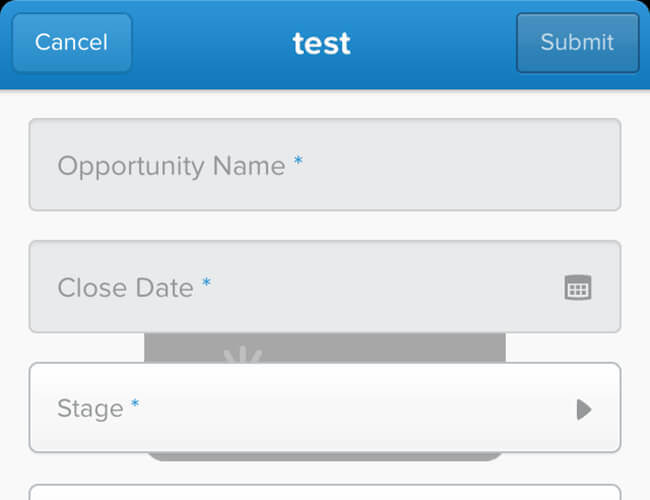
When you select that action, the fields you specified will be there and you can add your data and save the record.
Once you save the record, it will be synched back up to Salesforce and you can you can access it there. You’ll also see that a Chatter post was created on the account record and anyone who is following that record will get notified .
Go ahead and give it a try!


